
Ultimate guide to Christmas dinner: Turkey crown
ITS CHRISTMAS!!
Last year, with Christmas cancelled at the last minute (UK locked down restrictions for Christmas just ahead of the big day, so most of our plans were cancelled), I found myself with 2.5 kilograms of boneless turkey crown, with two adults and two kids to feed. Given seeing others or having people round was out of the question, it set up for a much more casual day - no stress about feeding big numbers or particular preferences, and no need to be entertaining guests - so I set about having some fun with the Christmas lunch.
I had opted for a turkey crown (which is the breast of a large turkey, boned, and then tied together in a vaguely cylindrical shape) for a change. I always prefer the darker meat (the legs and thighs) on poultry, but I figured the shape and consistency of a crown should make for an easier cook (it all needs to be cooked to the same temp, and has the same levels of connective tissue and fat). In my head, I was also thinking that a crown would be a good smaller option, given we might have only been entertaining a couple of guests (which does hold out, if you don’t go and order 2-3 kilo crown, which of course I did).
Of course, there will be people who bemoan that a turkey crown isn’t as impressive centrepiece as a full, bronzed turkey carcass, but honestly, I’m not one for carving at the table anyway. The amount of food, drinks and people around a table generally makes it a waste of space to have the entire bird on the table waiting to be carved (maybe I just need a bigger table).
1. How to buy a turkey crown
You should be able to find a turkey crown pretty easily. Most big supermarkets will probably stock them, but do be sure to check if its boneless or not (you can cook a boned turkey crown, but its slightly different and its just a bit simpler without the bones!).
However, as always, my recommendation is to find a decent local butcher to source one, especially if its a once a year kind of meal. A decent butcher will probably get you one from a local farm (or at least a farm that they have personally checked out and assured the quality).
2. Preparing the crown: dry brining
First step is to brine the turkey. There are generally two approaches to bringing: wet or dry. Wet involves putting the meat (turkey, in this case) into a tub of heavily salted water, where as dry is as simple as applying the salt to the meat and leaving it.
With a dry brine, over 24 hours, what effectively happens is the salt draws out the moisture from the meat (which sounds bad, but bear with me), but then the salt dissolves in that moisture and the dissolved salt basically transfers back into the meat. As you might have worked out from that description, the key here is time. If you are short of time, then don’t try to brine it in an hour or something, because you risk the moisture being drawn out but not re-absorbed. If you are short of time then you can skip the brine and just salt the meat immediately before cooking, but this is Christmas, and if you are only just getting your hands on a turkey less than 24hours before the big day, then you might just be doing what you can to get it cooked!
I always opt for a dry brine. There have been studies into the difference, and its a relatively negligible difference in moisture levels between the two, and at Christmas, I definitely don’t have space to be keeping a bucket of water with a whole turkey in it in the fridge overnight!
3.1 Cooking step 1: Low-and-slow - Sous vide
To cook the turkey, we are going to for a standard reverse-sear approach. That is, we will cook it low-and-slow, so it gently cooks the meat to temperature, and then finish it hot-and-fast to get a nice browned skin. As covered in my write-up on low-and-slow, the benefit of this approach is that it makes it much more evenly cooked, so you know when the very centre of the meat hits the desired safe temperature, the outer parts are not too much higher. Turkey breast is a very lean meat, so can dry out very easily if cooked too much, so low-and-slow is the key to getting it nicely cooked.
This variation of low-and-slow, we are going to use a sous vide circulator to cook it (if you don’t want to use sous vide, then skip to the next section for regular low-and-slow approach). Last Christmas, I cooked my crown sous-vide, and honestly it was just perfect. This year though, I’m thinking traditional low-and-slow on the kamado BBQ.
You can sous vide to a range of temperatures, depending on your preference (The FoodLab goes through a range of temps and the outcome here), but I cook mine at 65C/150F for around 5 hours. This is higher than probably a lot of sous-vide fanatics, but its a great consistency and moisture level to my liking (and re-assuringly not too soft for the more cautious eaters who question if things are safely cooked, despite explanations of food safety).
Another great side effect of sous vide-ing your turkey crown is it frees up the rest of your kitchen and oven for the rest of the cook, rather than hogging the oven all morning.
3.2 Cooking step 1: Low-and-slow - traditional (or BBQ)
If you don’t fancy sous vide-ing your turkey crown, then a traditional cook - be it in an oven or BBQ/smoker - can still be a huge success. We will use the exact same principles and benefits of low-and-slow but achieve them with regular cooking.
To do this, and do it well, I’d suggest an internal temperature probe that can remain in the oven throughout the duration of the cook is pretty essential. The temperature will creep up pretty slow, so there should be little risk of it hugely overshooting, but without an oven safe probe you will be having to open the oven and check pretty regularly towards the end of the cook!
To do this, I’d set up your BBQ/smoker for indirect cooking at about 110C/225F and get the turkey on. Personally, for Christmas dinner, I’m not adding much wood to the coal for smoking. I love smoked turkey, but its not really the flavours I’m looking for in the meal. At most I’d put a small amount of a mild wood, like a fruit wood (definitely not something like hickory)
You want to monitor the internal temperature, and you’ll be looking at taking it out when it hits about 68C/155F. Once it hits that, remove the turkey and check a couple places in the meat to make sure you have an accurate reading. This will probably take around two hours, depending on the size of the crowd. Leave it to rest for a good half hour - and again depending on the size of the crown, that may well continue carry over cooking another 5C degrees as it rests (keep the internal temperature probe in whilst resting).
As you might have noticed, we cook to a higher internal temperature when cooking traditionally - this is simply because we cannot guarantee the time at the correct temperature, so to err on the side of caution we take it higher. This of course means its not quite as moist as sous vide, but you can still get awesome results!
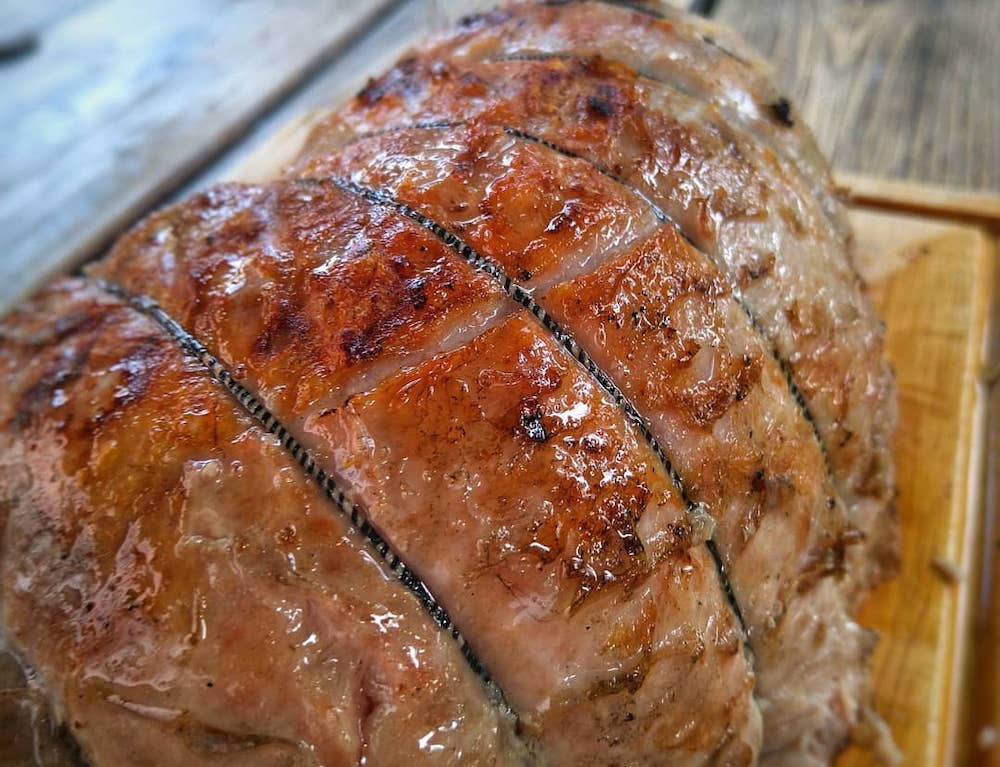
4. The sear
Whichever way you have cooked the turkey, we want to finish up by really crisping up that skin. Cooking the traditional way in the smoker will already have made a start on this, as the dry hot cooking environment will have been drying out the turkey nicely, where as the sous vide turkey at this point will not be looking great. It will be pale, damp and anaemic looking!
For the final sear you can use any hot-and-fast mechanism you like, but my go-to is always finishing on a hot grill! Obviously if you have just cooked the turkey low-and-slow, then you already have the coals going. Open up the vents and let the heat get nice and hot, then pat dry the turkey (especially important if you have sous vide it) and pop it on the grill. It shouldn’t take more than 15 minutes to get it nice and browned, turning it occasionally to make sure an even covering.
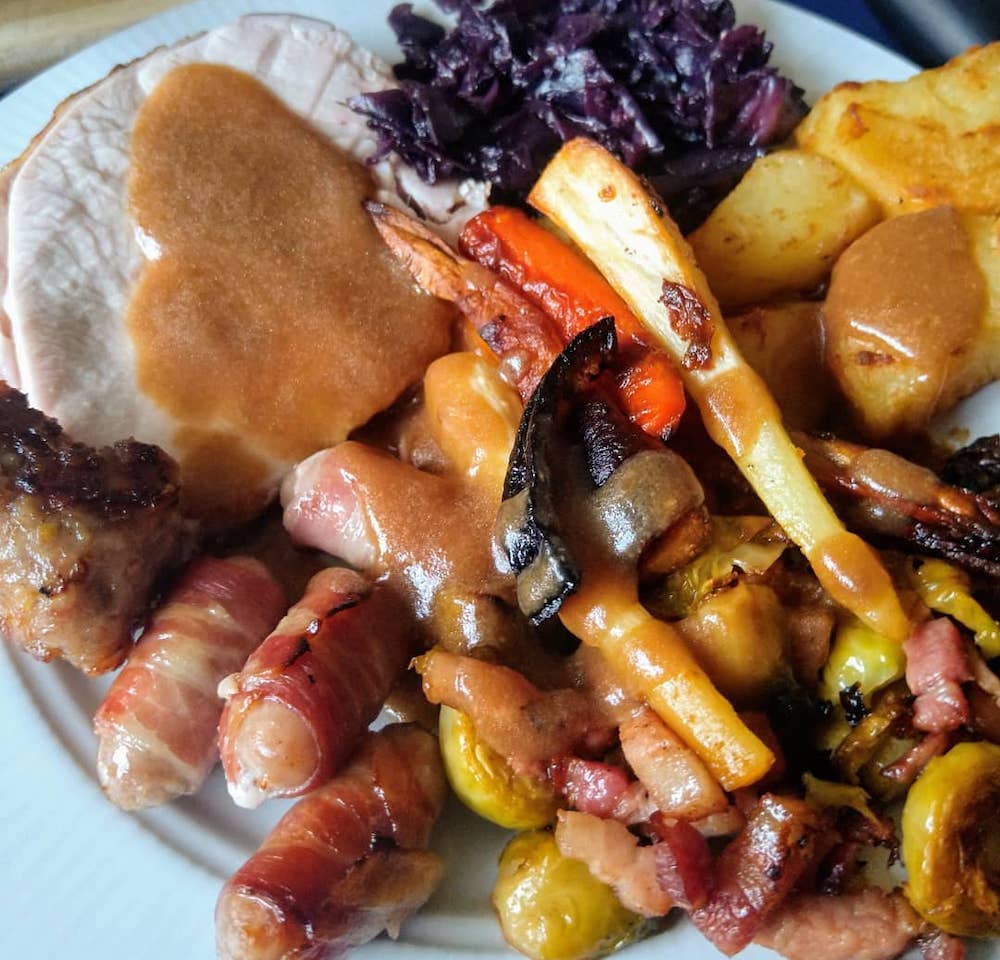
Then thats it! You have already rested the turkey pre-sear, so now you can just carve into slices and plate up.
- 1 turkey crown (4-8 people, depending on the size of the crown)
- 10 minutes
- 5 1/2 minutes plus overnight brining
Ingredients
- 1 boneless turkey crown, rolled and tied
- Salt
Directions
- 24 hours before the big day, liberally salt the turkey all over, and return to rest in the fridge.
- On the morning (with plenty of time), seal the turkey in a vacuum bag
- Sous vide the turkey crown at 65C/150F for 5 hours
- With about 30 minutes to go, light the coals on the grill and get them going hot
- Once the turkey is done with the sous vide, remove from the bag, pat dry and sear over the hot coals (and I mean really hot!). This should take about 15 minutes, turning occasionally so you get an even finish
- Carve and serve! (with sous vide you don't need to rest the meat after cooking, so you can serve whenever everything else is ready!)
More delicious recipes
This is one of the many fantastic recipes available on this blog