
How-to BBQ: The ultimate guide to caveman seared steak (dirty steaks)
One of the big BBQ trends that kicked off back a couple years ago was caveman tomahawks also known as dirty tomahawks, and it clearly shows no sign of stopping! This is a culmination of two trends: an increase in the popularity of tomahawk steaks and an increase in popularity of caveman or dirty steaks.
Further below, we will get into all the details of what a caveman or dirty sear is, and some of the science, but if you’re here just to find out how to do it, then look no further..
How to caveman sear a steak
- First of all, we need to prep the steak. Usually steak doesn’t need much trimming and will be ready to go, but we will want to generously season the steak with salt, ideally the day before, but whenever you can is fine (immediately before cooking is totally fine if that’s your timeframe!)
- Next up, we may want to reverse-sear it, depending on the size. If you have a big, thick steak, and you throw it onto white-hot charcoal, the outside will get nicely seared in a matter of seconds, but the middle will be raw (like, cold-to-touch raw, which is not a common steak preference). The reverse sear is basically a pre-cook phase where we gently cook the steak at a lower temperature so the middle is perfectly cooked, and all we need to do is blast the outside for the nice sear. Depending on how you like your steak, you will want to gently cook it in an over/smoker/sous-vide until its about -10C lower than the target temperature. If in the oven or BBQ, I’d usually cook it at a low temperature of around 120C oven temp and just take it out once the internal temp hits - probably not more than 10-30 minutes, but dependant on your steak size.
- Once it hits the perfect temperature, whip it out and prepare your BBQ for the caveman sear - we want to get the charcoal white hot and really strong, so open all the vents and keep the lid open to really get it going.
- Once the coals are white hot, gently knock them with a poker/tongs to knock excess ash off
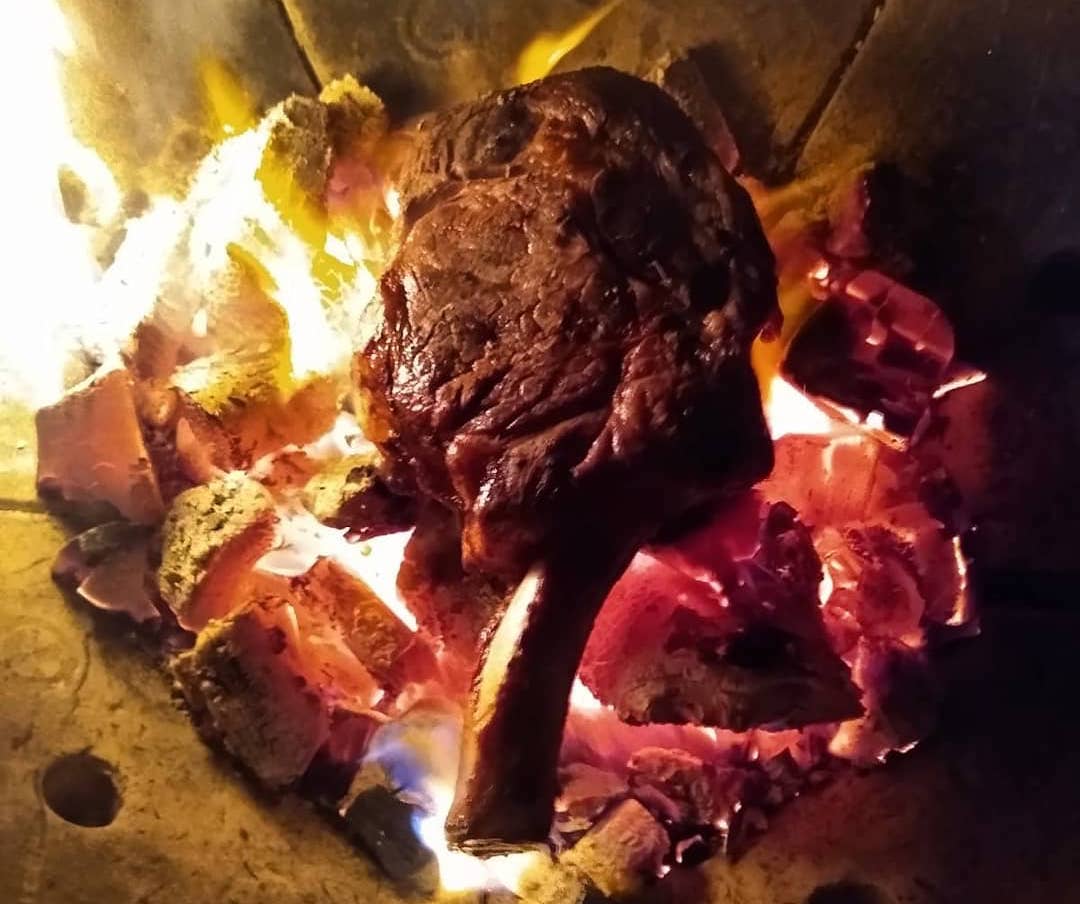
- Gently place the steak directly on to the charcoal - Some warnings here though: 1) Make sure you wear protective gloves and arm covering, the charcoal will be mega hot and you are getting close to it 2) try to be gentle placing the steak on the coal, both because you don’t want to disrupt the fire but also you don’t want to send rogue ash or coal flying about! 3) only use this method if you are confident cooking with live fire!
- Enjoy the smell, sight, sounds and all round theatre of the spectacle - it really is a great experience. I recommend doing it in front of your guests because the whole experience is just lovely!
- It will not take long to sear at all, and we have to be careful at these high cooking temperatures not to over do it - the first time you do it, check quite early (maybe 30 seconds) to get an idea for how quick its cooking (its so incredibly dependent on the current fire you really have to gauge it until you are comfortable with it). Once you have done it a few times you will have an idea for cooking times/speed.
- Once it’s done, whip it off the charcoal (safely, with gloves/tongs!), rest for 10 minutes before serving, seasoned with more salt (and any other accompaniments - I prefer to keep dirty steaks simple and let the meat, fire and salt to the talking - but a compound butter works well too)
1. What is a tomahawk steak?
The tomahawk is basically just a ribeye steak with the bone left intact, essentially making it look a bit like a tomahawk axe. Technically, there needs to be 5 inches of bone showing, otherwise it is just a meagre Cowboy steak! Just kidding, of course - actually the more savvy purchase is to buy a cowboy steak if you can, as you get almost identical results but you are paying for less bone. That said, many places label them all as tomahawks to jump on that bandwagon, so you might not see any difference.
Tomahawks boom in popularity is, like many food trends of recent years, thanks to Instagram. The large size and bone makes for fun and impressive looking photos. There are some people who look down on tomahawks on account of the fact that you are just paying more money for the bone (and an impressive instagram photo), but there is no denying they are a lot of fun and make for an great meal (instagram or not, if you have people around, its makes for a decent centre piece).
2. What is a caveman or dirty steak?
Not exclusively for cooking steaks, a dirty or caveman cook is where the food is placed directly on hot coals. As you can imagine, hot coal can easily reach 500+ degrees centigrade, so can very quickly cook food and easily achieve the Maillard effect (the effect that causes the deep brown colour on a proper steak house steak). Caveman tomahawks took off for two reasons, one being the Instagram friendly nature of throwing a piece of meat directly on the fire and the theatrics that come along with that, and secondly, the long handle makes for an easier way to flip over or remove from the fire (you still need gloves on though!).
The other benefit is the taste enhancement - soon as that meat hits the fire you will smell the amazing aromas of it cooking, and that live fire taste is really imparted on the steak like nothing else. Its like the flavours of the grill but super-sized.
Obviously throwing food directly into the coals isn’t reserved only for steaks, and you can experiment with anything you think suitable - but of course be aware that not only are you cooking at incredibly high temperatures, but you are also changing the cooking method to conduction, which allows for a much higher transfer of energy. Dirty beets are a particular favourite BBQ side of mine, mostly because they are so easy - just throw it into the coals for something like 60-90 minutes.
3. How to cook a caveman tomahawk: the reverse sear
For some smaller steaks, cooking caveman style is the simplest thing ever - light up the coals and get them white hot, knock the ash off the coals and then lay the steaks on, toss to get both sides seared and then rest and serve! The same process as you would in a cast iron skillet (although a bit quicker), but no extra washing up.
The tomawhawk (or ribeye, or cowboy, whatever - I will just call it tomahawk from here on out), is a much thicker piece of meat, likely weighing in at anything from 600 grams to 1kg+ so cooking at a high temperature using conduction (be it a pan or coals) makes it harder for an even cook without overdoing the outer layer.
4. Physics of cooking and energy transfer
When we cook the energy transfer takes place from the outer layer (the part touching the coals or pan) inwards, that means, the center of the meat is cooked by energy passed to it from the outer layers. This process forms a temperature gradient from the outside inwards - and the higher the cooking temperature, the steeper that gradient is (resulting in well-done outer sections whilst the middle cooked medium-rare).
It’s the same physics that dictates why we cook BBQ low and slow at lower temperatures: the closer the cooking temperature is to the target internal temperature, the more shallow that temperature gradient, and the more evenly cooked the meat will be. This is exactly what happens if something is cooked sous vide, the food is cooked at the exact temperature that we are aiming for as the internal temperature - and as you can probably work out from what we have discussed about temperature gradients so far, if the internal target temperature = the cooking temperature there is no gradient, it flatlines and you get perfect edge-to-edge cooks.
5. Reverse sear
The reverse sear is a fine technique for cooking any reasonable size steak (or any range of food - as that temperature gradient we talked about isn’t just applicable to steaks, it affects anything being heat up). The goal is to cook the meat low-and-slow first to achieve a reasonable cook throughout. This can be done on a BBQ with indirect heat or in an oven (or sous vide bath), the lower the temperature that you cook at, the longer it will take, but the more even the cook will be. If you set up your BBQ for indirect cooking at about 110 degrees centigrade (225F) and cook a steak, monitoring the internal temperature all along, it will probably take between 30 - 60 minutes to get the steak to temperature (depending on lots of things including thickness of steak - but as long as you are monitoring with an internal temperature probe then you’ll be fine!).
Now you have done that, you will have a minimal temperature gradient throughout the steak, and fairly close to edge-to-edge perfection, but the surface of your steak will be looking pretty lacklustre. It may even look a dull gray-ish colour (especially if you did the first step in the oven as it doesn’t benefit from any smoke) - this is where the caveman sear comes in!
As mentioned, at this point you have a perfectly cooked steak, done-ness wise, and will be perfectly safe to eat - it just won’t taste quite as good and might look a bit sad. So the final step is to achieve that Maillard effect by searing at a high temperature. At this point, if indoors, you’d want to heat up a heavy cast iron pan (if you have one, and make sure you really heat it up for at least 10 minutes), but we are going to cook it caveman style.
We will knock the coals a bit to remove the ash before laying the steak on top for a a minute or so (check on it after 30 seconds to see how its going), turning it every now and then so both sides get a beautiful deep brown sear, then remove and plate up!
6. Tips for caveman style cooking
- Traditionally people use lump wood charcoal, not briquettes - this is because lump wood is cleaner and it’s easier to knock the ash off. It doesn’t really matter if you get a bit of ash or charcoal sticking to your steak, it will brush off easily and just adds to the experience!
- Searing at a very high temperature obviously transfers a lot more energy to the meat, albeit only for a brief time whilst in there. To adjust for that, you should reduce your target internal temperature by a few degrees (it’s best to work out how much to adjust by trial and error, to your liking)