
How-to BBQ: Low-and-slow smoked babyback pork ribs
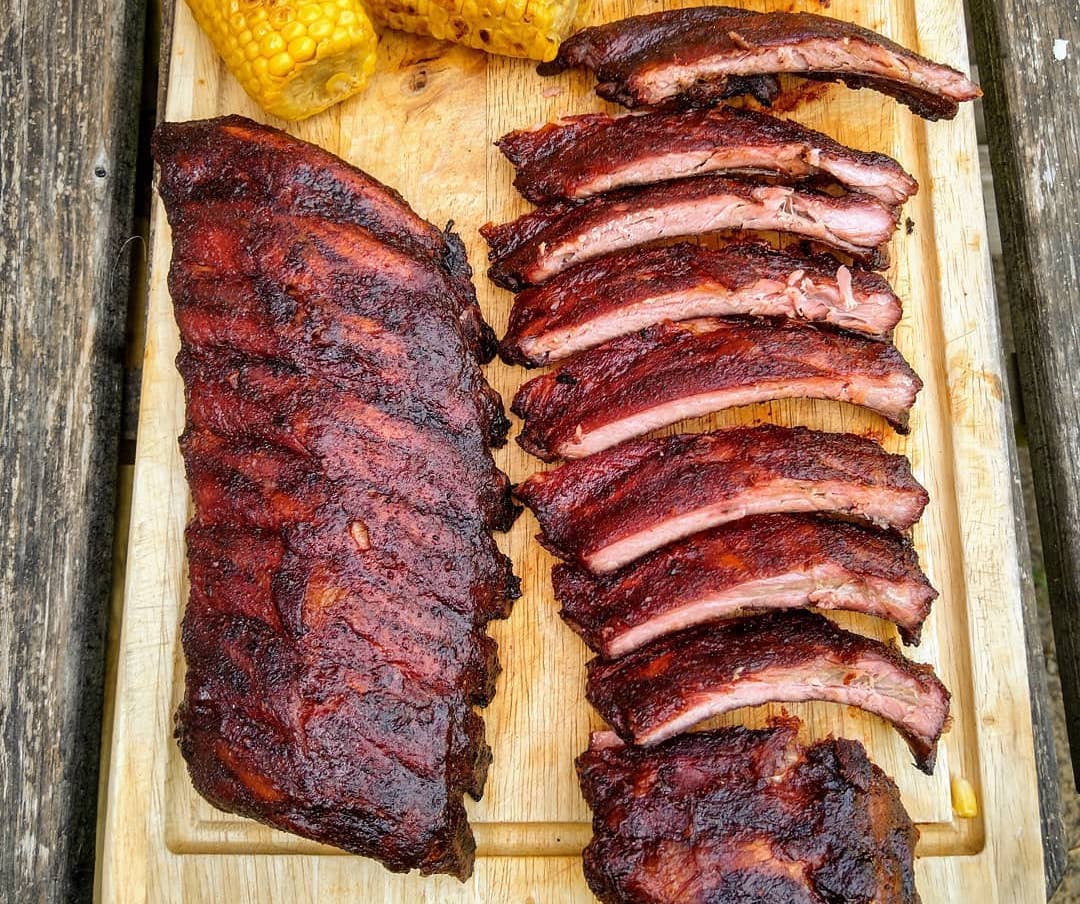
Pork ribs are a great place to get started on your low-and-slow BBQ adventure. They are a usually pretty reasonably priced, a pretty forgiving, quick cook and always a crowd pleaser. This is a simple how-to on cooking pork ribs - I will mostly talk about babyback ribs, but the same principle applies to other pork ribs, such as spare-ribs (sometimes called St Louis cut ribs), but the timing on each step might be a little bit longer. Also, pork ribs are a familiar sight for even the most green of BBQ eaters, so they usually go down well!
All these BBQ recipes will work equally well on a ceramic grill such as a Big Green Egg or Kamado Joe, a bullet smoker such as the Weber Smokey Mountain or a pellet grill such as Traeger or Broil King - no adaptation of the recipe or technique needs to change (you can even do them in the oven with the same technique - if you aren’t comfortable smoking or cooking low-and-slow on your grill yet, you can follow this technique in your oven ahead of your BBQ and then just finish them on the grill a bit to reduce the sauce and get a bit of that authentic BBQ flavour - your guests will still be super impressed!).
1. How to buy babyback ribs
If you want a rack of ribs your best bet is to go ask your local butcher - some supermarkets in the UK stock racks of ribs, but they are normally pretty small and not meaty at all. If you find some in your supermarket, you might be able to pick them up for about £3-4 so fine to pick up to experiment (although the butchers will likely be better value). If you are grabbing them from the supermarket look for the heaviest pack, as they will all be more or less the same length (and same number of ribs) so the heavier they are, the more meaty they will be.
What you are looking to avoid is what folks on the BBQ circuit call shiners. Shiners are when there is exposed bone on the top of the ribs, ideally the whole rack will have a decent layer of meat across the top, covering all the bones. When I have bought them from the supermarket they are often pretty much all shiners, which means you are left with only the meat between the ribs. But, get whatever you can!
2. Preparing babyback ribs for cooking
Prepping babyback ribs or other racks of pork ribs follows the same process, so can be applied the same. There are two steps to preparing ribs, and can be done in advance (normally a good idea to do this the day before cooking).
2.1 Remove the silverskin
On the underside of the ribs, there will be a fine, semi-translucent membrane (sometimes referred to as silverskin). Biologically, this is a connective tissue, holding things in place. Usually, in BBQ, we love connective tissue as it’s our magic ingredient that makes BBQ so great, however, this is not the kind of connective tissue we like. This connective tissue is called elastin, and unfortunately not something we want, so we just need to remove this one.
To remove, you need to gently loosen a bit of it towards one end with a butter knife, and once you get enough of it to get a grip, pull it and try to peel it all the way off. Normally, once you get the hang of it, its pretty easy to get it all off in one pull, but it doesn’t matter if you have to kind of hack it off in pieces. The video below shows Aaron Franklin removing it (the whole video obviously worth watching!).
If you leave these on, they will be a bit chewy on the bottom, but not the worst thing in the world (interestingly, Aaron Franklin says in that video that he doesn’t bother with this in his restaurant as its just too time consuming in bulk).
2.2 Apply dry rub
Normally, before I apply my dry rub, I will apply a layer of yellow mustard (French’s or Heinz) - this will just help the rub stick to the ribs a bit better, the mustard flavour won’t be noticeable after cooking so you don’t need to worry about people not liking that taste.
Once the mustard is lightly smothered on to the ribs, I apply a liberal dusting of the dry rub. This really should be quite a decent covering, so don’t be shy here. If you want to make your own rubs then there are lots of recipes and options you can do, but if you want to play it safe for the first cook then a pre-bought rub is probably a good option. Angus & Oink here in the UK make lots of great rubs, and for pork ribs I’d highly recommend Pigasus, Sweet Butts & Bones or IRN BBQ!
3. How to smoke baby back ribs - The 3-2-1 technique
The most common technique you will hear mention when it comes to BBQing ribs is the 3-2-1 technique. This simply means cooking the ribs uncovered for 3 hours, wrapping them in foil/butcher paper and cooking for a further 2 hours and then cooking uncovered for the last 1 hour (I’d normally cook this at 110 degrees centigrade/225F).
For babyback ribs, this will often be a lot longer than you need, but the general technique is good. The first 2-3 hours or so, the ribs will still take on smoke flavour, so I’d still keep them unwrapped for 2 hours, wrapped for 1.5-2 hours then unwrapped for 30 minutes to finish. But each step here has a different purpose, so depending on what you want to achieve you can adjust the timings to match.
3 - unwrapped cooking - The first step is to develop that classic BBQ smokey flavour, its only in the early stage that the meat takes on this flavour. If you cut this shorter then you risk loosing some of that flavour, but to be honest you should easily get a decent smoke flavour after just 2 hours.
2 - wrapped cooking - This step is to help tenderise the meat and speed up cooking. Wrapping in foil creates a much more humid cooking environment, which makes for a much more efficient transfer of energy - similar to how braising is a lot more energy efficient method of cooking. If you have time on your side you could reduce this, but likewise, if you are short on time, if you increase the time wrapped, the overall cook time will come down.
1 - unwrapped cooking - This final step is to dry out the bark a bit, and also for saucing them (if you are doing that). As the middle step is such a moist, humid cooking environment it will leave the outside of the ribs moist. Whilst pork ribs don’t normally have a strong bark the same way we would with beef, we want them a little dryer. If we are saucing the ribs, then we will also do this during this stage of the cook, and the heat will reduce the sauce a little, giving them the characteristic stickiness people associate with ribs.
So, knowing what each of the 3-2-1 phases achieve, we can adjust our cooking times based on what we need. If we are short on time, cooking the middle step for longer will reduce the overall cook time, but likewise if we are spoilt for time we can push through and cook unwrapped for longer (even the whole cook!).
4. How to check for “doneness” - The bend test
Ordinarily in BBQ, doneness can be checked my probing with a thermometer - both checking the internal temperature of the meat but also the tenderness (how east it is to push the thermometer probe through the meat). But ribs are a lot smaller, so a thermometer probe is a lot less effective. Instead, for ribs we check with something called the bend test. Once you are approaching the end of the cook, you simply pick up the ribs by one end and let it gently bend/bounce - if it doesn’t bend or break much then it needs a bit more time, ideally you should start to see a crack in the surface of the ribs, between the bones. See the technique in action in the video below with Meathead.
If it’s a bit too far gone, it might just snap or fall apart a bit - don’t worry about this, they will still be just fine! A lot of BBQ purists will tell you there should still be a bit of bite on the meat and bone, and the bones shouldn’t just slide out - but unless you’re feeding purists, I wouldn’t worry about it - that kind of fall off the bone quality is probably going to be loved by your dinner guests!
- 1 rack of ribs
- 10 minutes
- 4 - 6 hours
Ingredients
- 1 rack of baby back ribs (a.k.a pork loin ribs)
- Yellow mustard (Frenchs/Heinz)
- BBQ Rub (see notes for recommendations)
Directions
- The timings of each phase can be adjusted, as per notes above. And you should test for doneness when you are unwrapping, it maybe that they are already very tender and cooked at that point.
- As per directions (see Aaron Franklin's video above), remove the membrane on the back of the ribs with a knife
- Apply a light coating of yellow mustard to the ribs, top and bottom
- Liberally apply the BBQ rub on all sides of the ribs
- Set up the BBQ for indirect cooking at 110C/225F, add a few pieces of wood and smoke the ribs for 1 1/2 - 2 hours
- Remove the ribs and wrap tightly in foil, there should be no moisture escaping from it (neither steam nor leaks)
- Return to the BBQ and cook for 1 1/2 - 2 hours
- Remove from the foil and return to the grill to finish off uncovered. If you want to sauce the ribs, apply some BBQ sauce at this point. The sauce should reduce to a sticky consistency during this stage. Cook for a final 30 minutes
- Check for done-ness using the bend test (see the video above)
More delicious recipes
This is one of the many fantastic recipes available on this blog